This Icing Tattoo Cookies tutorial is courtesy of our contributor Amy…It’s been a few straight days of rain here so I felt compelled to brighten things up with some colorful rainbow cookies! The color and patterns on these cookies may look intricate, but they are actually a snap to prepare using printed sugar sheets!
This package of Duff Icing Tattoos called to me as I strolled through my local craft store. Its normally used for cake decorating but I just knew I could make it work for cookies. I’ll share some helpful tips that will soon have you slapping printed icing sheets on every dessert in sight!
Icing Tattoo Cookies – Supplies:
- Cookies baked in your choice of shape (rolled dough recipe)
- Printed sugar sheets (these are available online and at many craft stores in a huge variety of solid and printed patterns)
- Ziploc bag
- Scissors and/or craft punches
- White royal icing (royal icing recipe)
- Edible ink marker
- Piping gel and food safe paintbrush (optional)
- Sprinkles and colored piping icing (optional)
A few helpful tips:
Sugar sheets can be turn dry and brittle if exposed to the air for too long – even while you are cutting multiple sections on the same sheet. Once your package is opened, be sure to store the sheets in a ziploc bag whenever you aren’t immediately handling them.
Colored icing will bleed through the pattern of the icing sheets! If you are applying the image directly onto wet icing you MUST use white icing as the base color. If you’d like to use a different color, I’ll show you an alternative application in a moment.
If you want to cover the entire cookie or a large portion with the edible image, start by outlining the shape of your cookie using a food safe marker. I recommend outlining on the backing of the sheet so the ink doesn’t bleed into the icing design. Cut along the outline but leave the coated backing sheet attached to the design. Store in a ziploc bag until ready to use.
If you’d like to just add pops of color or geometric shapes, punch out a few areas using scissors or craft punches. These Paper Shapers are available in a variety of sizes and shapes. They give you a perfectly cut edge without the hassle of tracing an intricate design.
Let’s start by applying an icing sheet across the entire cookie. Outline and fill in the base of your cookie using white royal icing. It is VERY important that you only do this white icing if you want to apply to the wet cookie.
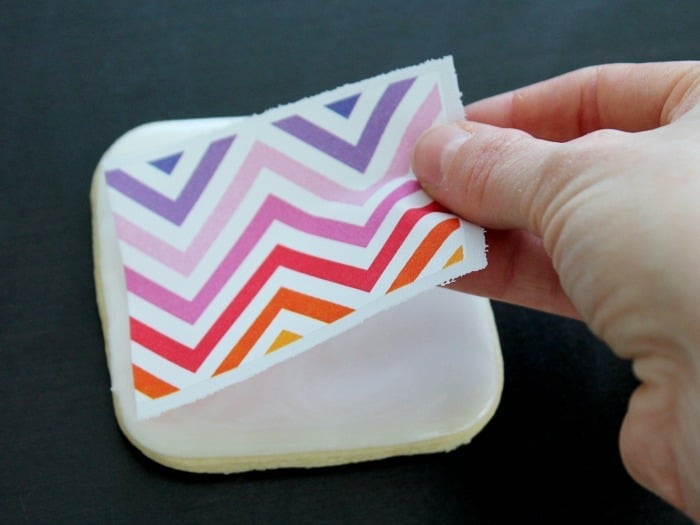
Gently pull back on the base layer and your printed image should start to pop up. I like to use another piece of backing to slide between the layers. This will help lift the image from the backing without causing accidental tears. You’ll notice I left the white border on the image for easier handling. Once you get comfortable cutting, peeling and applying you can trim the edge all the way down so there is no overhang.
Position the edge of the icing sheet along the edge of your cookie and gently release the image onto the cookie. Do not press the image into the icing, but carefully smooth along the surface every so slightly. If you have any overhang you can carefully trim now, or wait until the cookie is completely dry.
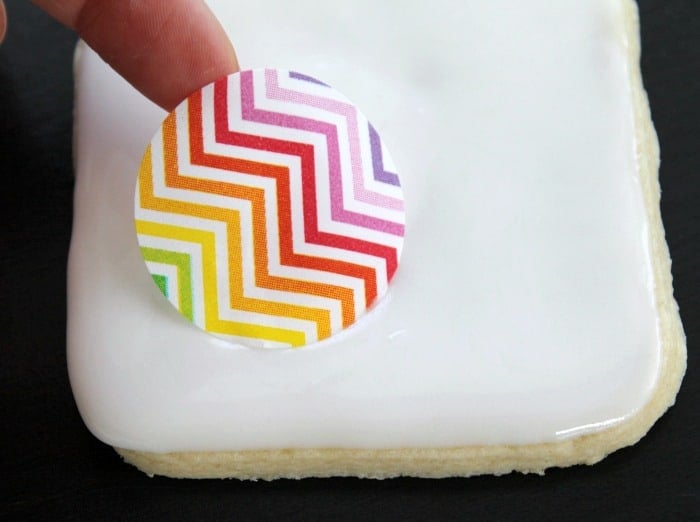
The same concept applies for using smaller areas of icing sheets on your cookie. Flood, peel and apply wherever you like using very delicate pressure to ensure an even application. Add dots, stripes or any pattern that you like!
If you want to add accents to a colored cookie base, you can by using a little bit of piping gel! Flood your cookie using the color of your choice and allow to dry completely. Once dry, brush a very thin layer of gel on your cookie using a food-safe paintbrush.
You’ll see that the piping gel should just be a shimmer on the cookie – not a huge wet stripe or glob.
Carefully position your icing sheet onto the area painted with piping gel. Use light pressure to smooth the image onto the cookie.
I wanted to add a little more detail and rainbow fun to my cookies, so I went back with some purple piping consistency icing and nonpareils.
Pipe a line of icing anywhere you’d like your sprinkles to stick and gently press the cookie into a shallow dish of sprinkles. You can use a toothpick to help position any rogue sprinkles.
Get creative, go crazy and have fun! The options are truly endless once you get the hang of working with the images!
We’d like to extend a big THANK YOU to Amy for sharing this icing tattoo cookies tutorial with us. Be sure to follow her on Facebook & Instagram for adorable cookie decorating ideas. You can also order cookies from her! Check out the FAQ section of her website for more information.
See more of Amy’s cookie creations here – like these adorable Ice Cream Cookies!


