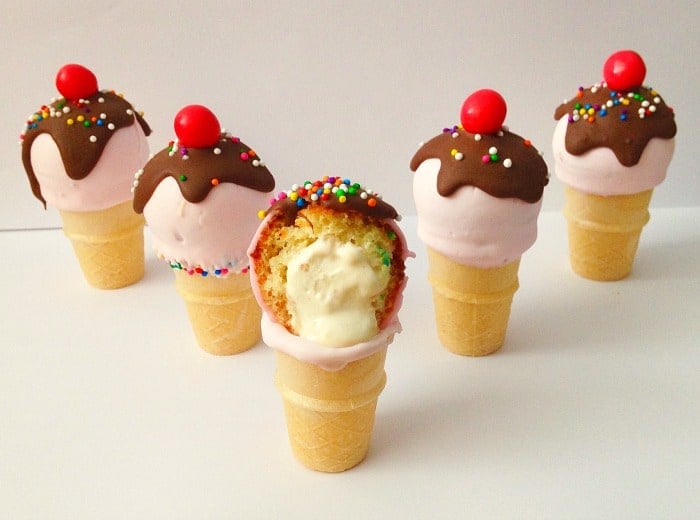
This Ice Cream Stuffed Cake Pops tutorial is courtesy of our contributor Karen of Cake Bites by Karen…A little while ago, I decided to finally try my hand at making ice cream cake pops which I had seen on many videos and Instagram pages. It was surprisingly easy and really fun! Then I had a crazy and out-of-this-world idea – what if I stuffed the ice cream cake pop with… wait for it…ice cream?! GASP! I had been experimenting with stuffing cake pops lately – dare I try? Well, to be honest the first attempt was a royal mess but I kept at it and I finally have something I can present to you.

Ice Cream Stuffed Cake Pops – What You’ll Need:
- cake balls (I use ones baked in a mold as it is easier to work with)
- mini ice cream cones
- ice cream (any flavour)
- apple corer
- piping/Ziplock bags
- chocolate melts (any colours)
- sprinkles (optional)
- gum balls (optional)

STEP ONE: The Cake Ball
Again, you can make your cake balls the traditional way (crumbled cake, mixed with frosting, kneaded into dough and then rolled into a ball) but for stuffing cake balls, I find it easier to bake the cakes in a mold — it’s cheating but it works. Follow the cake mix directions using an extra egg and half the required milk/water for a denser cake ball. Bake until firm.
STEP TWO: Preparing for Stuffing
Once cooled, trim any Saturn-liked rings around the cake ball (see my previous tutorial) to smooth its appearance. Take your apple corer and push 3/4 way into the ball. Remove the cored section and cut it until you have 1/4 piece left which you will use to plug up your cake ball later.

STEP THREE: The Filling
Fill your piping or Ziplock bag with your ice cream and pipe the hollowed cake ball with ice cream deliciousness, leaving enough space to cork the top section with the 1/4 cored out piece noted in Step Two. Before I fit the cored piece in, I usually line the insides with chocolate so the cored piece stays secured to the cake ball.


STEP FOUR: Patience
Let your ice cream cake ball set for a couple of minutes in the freezer.
STEP FIVE: Where Ice Cream Meets Cone
Remove your cake balls from the freezer. Dip the top of your cone (about a centimetre) into your chocolate and attach the cake ball to the top or chocolated portion of the cone. Put aside and let the chocolate dry. Remember: there is ice cream in your cake ball which will melt so as soon as the chocolate has dried and the cake ball and cone are one, move onto Step Six.


STEP SIX: Dipping and Decorating
Once dried, dip the cake ball, covering it completely or to the top portion of the cone. Let dry – at this point you can return it back to the freezer.

To add the “fudge” you can use a squeeze bottle or spoon a small amount to cover chocolate over the top, giving it a run down or dripping effect. To manipulate the fudge, I add a small amount at a time, shaking it slightly to run down the sides.

If you plan to add sprinkles or a cherry on top, it’s a good idea to add it at this point when the “fudge” is wet so they can attach themselves and set.

SPECIAL NOTE: Because I’m working with ice cream, I use the freezer quite often during the “chocolate drying” phases. It speeds up the drying time and keeps the ice cream inside the cake ball from melting and leaking while decorating.
So there you have it! Who says cake pops always have to have sticks. These ice cream stuffed cake pops are perfect for the upcoming summer party season and kids love it!
Thank you to our contributor Karen for this fun ice cream stuffed cake pops tutorial! Check out more of her cake pop creations on her Cake Bites by Karen Instagram page.

These look wonderful! May I ask what mold do you use to bake the balls? Thank you! Donel