This Ice Cream Cone Cake Pops tutorial is courtesy of our contributor Deanna…After a long winter I always looked forward to June for many reasons. My favorite reason was it meant all the little ice-cream shops in town had finally dusted off their freezers and were ready to serve up 30 something flavors of ice-cream. I wanted to bring something cute, simple, and in season for this tutorial. That’s when it hit me… ice-cream cone cake pops! They’d be perfect for those kid-friendly BBQs without the melted ice-cream stickiness that came along with.
Here’s a short & cute video on how to make these adorable cake pops! You’ll find the full written instructions below.
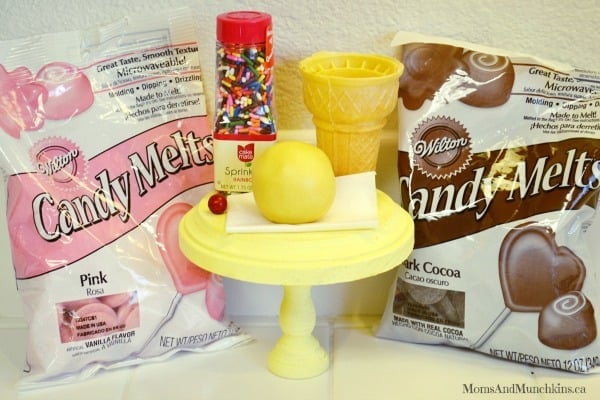
Ice Cream Cone Cake Pops – What You’ll Need:
- Ice cream cones
- Double sized undipped cake pop balls (Not sure what flavor to make? Here are a few suggestions: Cherry Cake, Cheesecake, Marble Cake)
- Pink candy melts
- Chocolate candy melts
- Your favorite sprinkles
- Parchment paper
- Red sixlets (or any round red candy you can find will work)
Ice Cream Cone Cake Pops Tutorial:
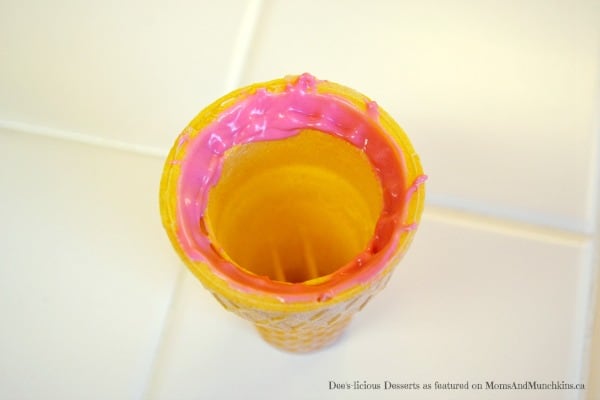
First, melt your pink chocolate. Remember chocolate is very temperamental, melt it slowly, and stir often.
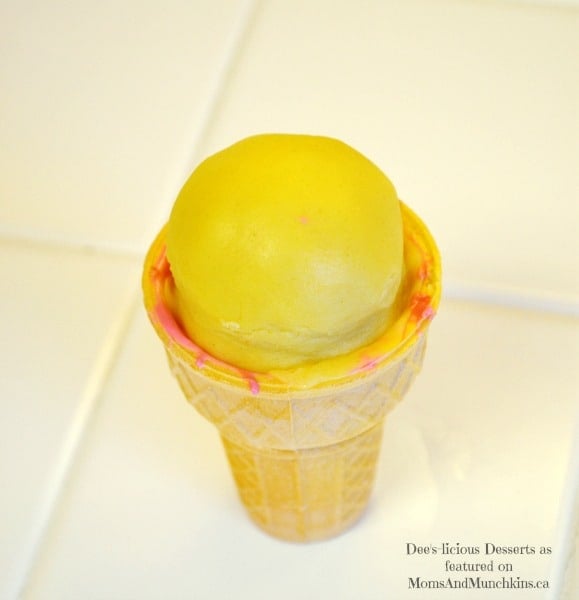
Then you’ll want to apply a decent amount of the chocolate to the inside rim of the cone. This will help keep that heavy cake pop ball in place when you dip. Before the chocolate dries place your giant undipped cake pop ball onto the cone.
Next, smear some more of the chocolate around the edge. Again, this is important because the cake pop ball is really heavy and can easily fall off while you’re dipping. Let that chocolate completely dry.
Now dip. Let some excess chocolate run off (but not all) and then quickly turn upright. Ice-cream is melty, so to make this cake pop look more realistic I tilted the cone while the chocolate was settling so some fell over the lip.
While you’re waiting for that to dry, get your chocolate melted for the “chocolate syrup”. When ready, spoon a blob right on top and carefully tap the cone on the counter while occasionally tilting to get a more realistic look.
Add your favorite sprinkles and top with your round red candy.
*If you mess up at any point in dipping, flop the cone upside down on the parchment paper to create an adorable melted ice-cream look!
Thank you to Deanna for sharing this delicious Strawberry Cake Pops tutorial with us. To see more of Deanna’s delicious creations, visit her Dee’s-licious Desserts page on Facebook. She also makes and ships cake pops as well!
For more delicious dessert ideas, visit our Easy Party Food & Family Meals page.
We’re always adding tasty new ideas! Never miss an update by following us on Facebook, Twitter, Pinterest, Google + and Bloglovin’.


I’ve always wondered how to make these! Now I know. These look so adorable. I’d be thrilled if you’d link up at this week’s Off the Hook!
These are adorable and, unlike a lot of other cake pops, look totally do-able for basic skilled bakers. Thanks for linking to the Craftastic Monday party at Sew Can Do! Would love to feature this if you could share a link or the party button somewhere (couldn’t find a party page if you already have one).
Oh my word, these are so cute! I pinned them to my birthday party board. Gotta remember this. You are so talented! #projectinspire{d}
Wow, these are just too cute. I am sure the kids love them. I have to try these with my grand kids.
Bev
Appreciation to my father who informed me regarding this weblog,
this web site is truly awesome.