This Father’s Day cookies post is courtesy of our contributor Amy…Father’s everywhere love cookies. Its a proven fact. So skip the tie this year and give him what he really wants – yummy treats made just for him!


Father’s Day Cookies:
These cookies were made using this awesome stencil from Buttercup Love Designs. She has tons of options to choose from, you may just want to order them all! Check out her selection here.
I typically use an airbrush to stencil my designs, but I wanted these cookies to have a more “masculine” feel. I love the texture and dimension royal icing creates. Follow these steps and make some for all the Father’s on your list this year.

Fill a piping bag with your choice of flood consistency icing.

Outline and fill your cookie getting as close to the edge as possible. This particular stencil design is a 3 inch square so it just fits my 3 inch cookies. Don’t you just love the shine of freshly iced blank canvas?!?
Allow your cookies to dry at least 6 hours. You want a solid icing base to stencil on, otherwise you’ll crush your flooded cookie.
Mix up some stiff consistency royal icing. The icing should be spreadable, but not so loose that it runs off your spatula.


Place your stencil on your cookie. The pink square pictured is called the Stencil Genie – a 2 piece frame with magnets on each corner. I’ve found that it’s THE PERFECT tool to hold your stencil in place while you work. You can also use simple magnets from the hardware store to secure your stencil, or if your cookie is larger than your stenciling area you can simply use your fingers to hold it in place. I’ve tried this a few times but I always seem to accidentally shift my stencil leaving a smudged mess behind. You can purchase a Stencil Genie from Creative Cookier here.
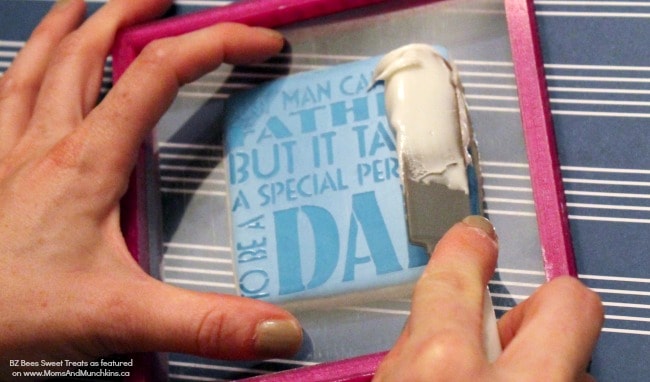
Scoop a bit of stiff icing onto the underside of an offset spatula.

Gently spread the icing across your cookie in smooth even strokes. Use the edge of the spatula to gently remove any excess icing once the entire stencil area is covered.


Carefully lift off your stencil and admire your design!

Delicious and Dad-Approved!

Happy Father’s Day! I’ll be back for more cookie fun next month!
We’d like to extend a big THANK YOU to Amy for sharing this Father’s Day cookies tutorial with us. Be sure to follow her on Facebook & Instagram for adorable cookie decorating ideas. You will LOVE her designs! I first came across her beautiful cookie creations on Instagram and I was immediately a fan of her work!! Have a special celebration coming up? You can also order cookies from her! Check out the FAQ section of her website for more information.