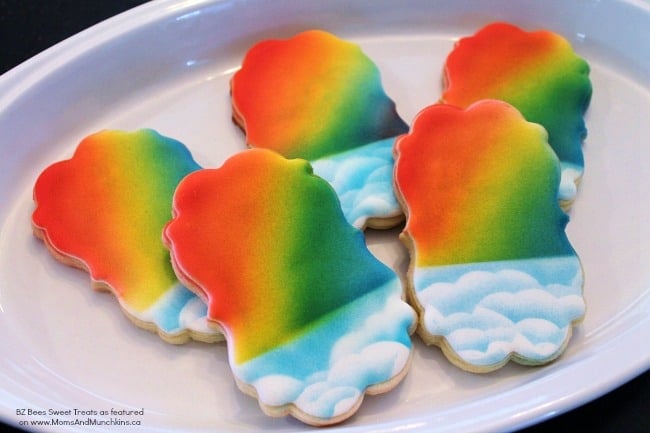
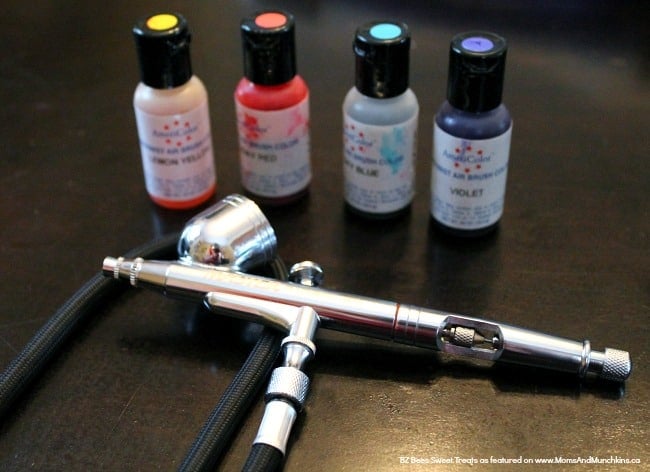
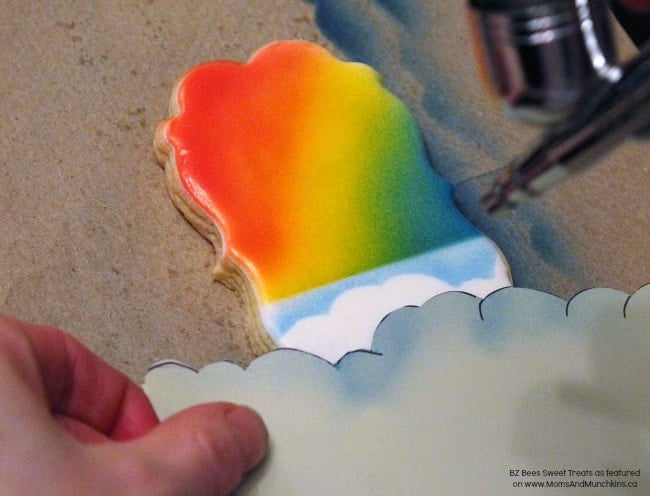
This post is courtesy of our contributor Amy...Its finally SPRING and I couldn’t be more excited! We’ve had an especially cold winter this year, so I think we are all ready for some warm sunshine. These rainbow cookies are the perfect way to celebrate the arrival of warmer days! You’ll just need a few tools to get the job done.
I used an airbrush machine to make these cookies, but you could also use Wilton color sprays if you don’t have an airbrush. If you want to make the investment, this kit is a great price and already includes everything you’ll need for this project. You’ll only need yellow, red and blue to make the rainbow and clouds.
Start by baking up your cookie shape of choice, and flood them all with white royal icing. Allow them to dry 6-8 hours, or overnight.
Rainbow Cookies Tutorial:
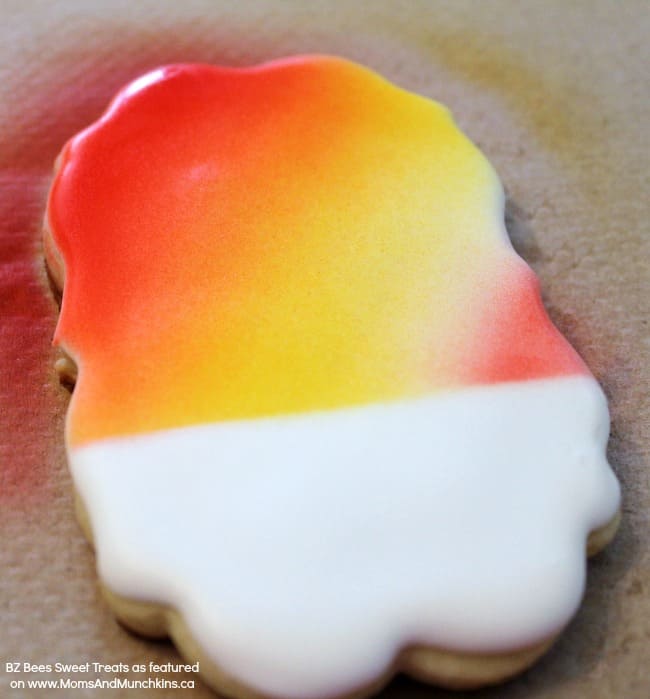
Block off the lower third of your cookie using a piece of cardstock. Using your Wilton spray or airbrush, spray a diagonal yellow line across the center of the cookie. I made my yellow sections a little more than an inch wide.
Next, add red to your airbrush machine (no need to rinse since you’re going from a lighter to darker color). Spray the left third of your cookie with a light layer of red. Be sure to overlap a bit of the yellow area to create an orange line, and then give the outermost edge a second coat of red. If you have enough space on the right of your cookie spray a very small triangle or red. You’ll overlap this section with your blue spray to create a purple line.
Rinse out your airbrush well and add your blue. Spray the right third of your cookie being sure to overlap a bit of the yellow section to create green. Again go a little heavier as you move across the cookie to create a nice blue. Overlap your red section if you decided to make a purple area.
Voila! A beautiful gradient rainbow with only three colors and you only have to make a single batch of plain white royal icing!
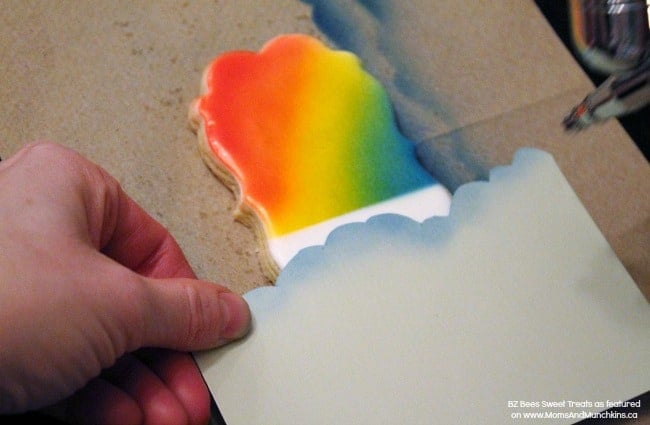
To make the clouds beneath the rainbow you’ll just need a quick template. Sketch out a quick scalloped outline on a piece of cardstock, varying the size and height. Cut along the line and use the bottom portion as your stencil.
Refill your airbrush with a bit more blue and turn down the pressure or speed on your machine. You’ll want a very narrow controlled spray area when working on the clouds.
Place your cloud template about 1/2 inch below the end of your rainbow. Spray a fine mist across the edge of the cloud template, using small circular motions. Move your template down and shift right or left to create a different cloud design. Spray again. You can probably fit 3-4 cloud lines on the bottom of this cookie. Be sure to leave enough white space between them.
Karen’s Cookies has a few great tutorials on airbrush basics here and here.
Give it a try! It opens up a whole world of decorating possibilities!
Happy Spring everyone!
We’d like to extend a big THANK YOU to Amy for sharing this rainbow cookies tutorial with us. Be sure to follow her on Facebook & Instagram for adorable cookie decorating ideas. You can also order cookies from her! Check out the FAQ section of her website for more information.


