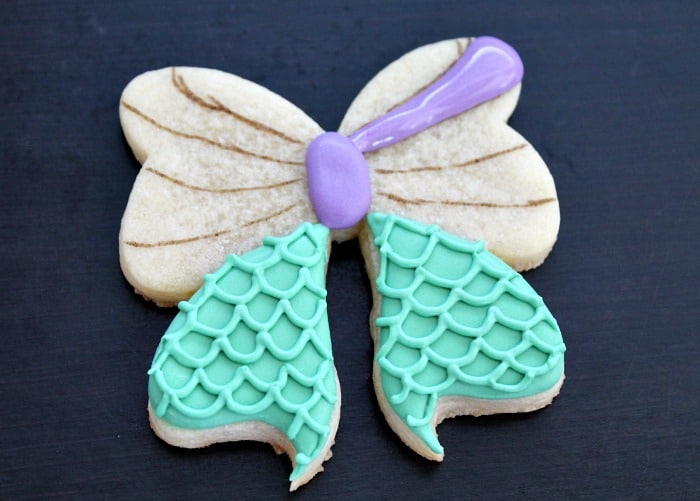
This Mermaid Bow Cookie Tutorial is courtesy of our contributor Amy of BZ Bees Sweet Treats…I don’t know about you, but I just love discovering new accounts to follow on social media. I love seeing how much creativity is out there and often pull inspiration from random pictures and ideas I come across. I recently started following Castles & Confetti on Instagram and literally swooned when I saw their new mermaid pin. I am a total Disney nerd so this Ariel inspired accessory was right up my alley, and the PERFECT design for a cookie tutorial. Be sure to head on over to their Etsy shop and snag a pin for yourself, then whip up a batch of your own delicious mermaid bow cookies.
Mermaid Bow Cookie – What You’ll Need:
- bow shaped cookies (I used SweetleighPrinted’s signature bow cutter for this design)
- purple 15 second icing (I used Americolor Regal Purple)
- green 15 second icing and piping consistency icing ( I used a combination of Americolor mint green and royal blue with just a touch of ivory to achieve this color)
- edible ink marker
- edible silver metallic paint (I used a Rainbow Dust click twist brush in Metallic Dark Silver which I purchased from How Sweet Is That, but you can also use silver airbrush color and a fine tip paint brush)
- optional – pearl sheen airbrush and/or edible shimmer dust
Start by outlining and flooding the tail sections of your bow using the 15 second consistency green icing.
Once the tail sections have dried, add the center knot using the purple icing.
Using a scribe or toothpick gently poke 4-5 equally spaced holes horizontally across one tail section.
Using your piping consistency icing, pipe a series of scallops connecting one hole to another.
Create a new row of scallops below by piping an arc connecting the center of each curve above.
Continue piping scallops above and below until the entire section is covered in the scales. Repeat on the second tail.
Draw guidelines for your clam shell bow sections using the edible ink marker. I made 5 sections on each side.
Fill in alternating sections using the purple icing.
Allow these sections to crust over before filling in the remainder.
I just love the convenience of these Rainbow Dust edible paint pens – color and brush all in one! They can be tough to find sometimes, so feel free to substitute with silver airbrush color if you have it on hand.
Wipe off any excess color from your brush and gently paint across the scales. Don’t worry about covering each line completely – you just want to add a slight shimmery effect.
Once the bow sections were totally dry I went back and painted the top section on each side with a little bit of purple gel color diluted with vodka. You can easily omit this step by mixing a slightly darker shade of purple when you’re preparing the icing, or by skipping all together. I just think it adds a nice bit of dimension to the clam shell bow.
Once my cookies were totally dry I have them a light mist with Americolor pearl sheen airbrush color and a quick sprinkle of edible glitter dust. Again, totally optional but what’s a mermaid without a bit of sparkle?
These adorable bows would be absolutely “mer-mazing!” at a Disney princess party, or any summer/beach bash. Happy baking!
We’d like to extend a big THANK YOU to Amy for sharing these fun cookies with us. Be sure to follow her on Facebook & Instagram for adorable cookie decorating ideas. You can also order cookies from her! Check out the FAQ section of her website for more information.


