This Cinco de Mayo cookies decorating tutorial is courtesy of our contributor Samantha of The Smarter Cookie…In just a few short weeks, we’ll be brushing off our maracas and sombreros so we can celebrate Cinco de Mayo! Amongst my group of friends, we use this as an opportunity to eat tacos and margaritas (although, we don’t need any special occasion for that – we just like to use the holiday as an excuse). So this year, I decided to make some cookies to help celebrate!
Cinco de Mayo Cookies – What You’ll Need:
- White 20-second icing that’s on the thinner side
- Green 20-second icing that’s on the thinner side
- White sanding sugar
Cinco de Mayo Cookies – Margarita Glasses:
To make the margarita cookies, I used a Wilton cutter that came in a set; however, I wasn’t happy with the overall shape of the cookie. I felt the stem of the glass was too thick so if you can get your hands on a custom-made margarita glass cutter, that may be a better option. For the limes, I simply cut a circle in half with a pizza cutter.
Begin by outlining the shape of the glass with the white icing. You can use a PME 1.5 tip, or a Wilton 2 tip for this portion. Again, as I wasn’t thrilled with the thickness of the glass stem, I simply just made my own line rather than outlining to the edge of the cookie. If you prefer a thicker-stemmed glass, feel free to go to the outer edge of the cookie.
Once you let the outlining set, you can then “fill your glass” with the margarita! I stuck with green icing to match the limes I wanted to make, but you can make the margarita yellow, yellow-green, blue, or whatever color will match your party décor! Smooth out the icing with either an offset spatula, boo boo stick, toothpick, or scribe tool. I prefer the scribe tool as it’s easy to clean and can be helpful in popping any pesky air bubbles that are created.
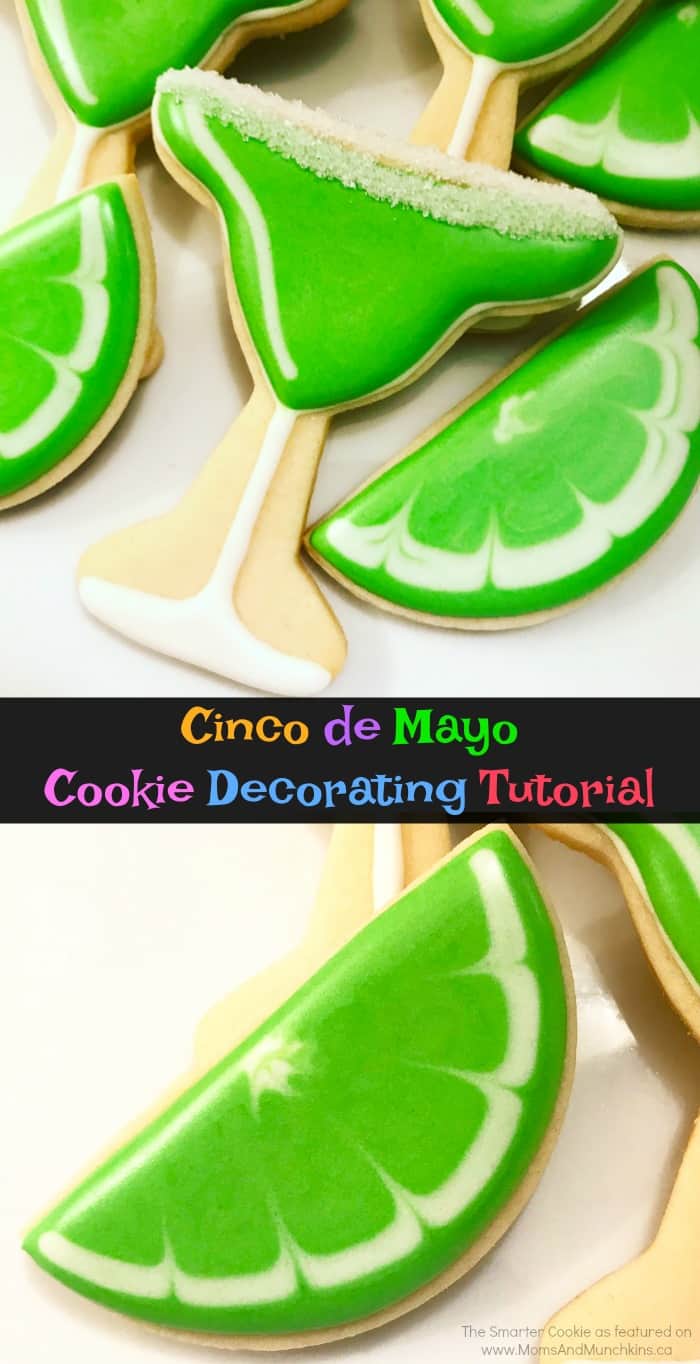
Before you set this aside to dry, you’ll want to add the “reflection” detail. This requires the use of the wet-on-wet technique, so before the green icing sets, quickly pipe a white “reflection” line in the drink. This is fairly simple as you’ll just follow the outline of the glass. Once this layer dries, you’ll see that the white will dry within the green icing, rather than on top of the green icing layer.
Before you can add sugar to the rim of the glass, allow the cookies dry for a bit, preferably overnight or for at least two hours in a dehydrator. If you handle them too soon and the icing is not dry, you run the risk of denting the icing and destroying your work.
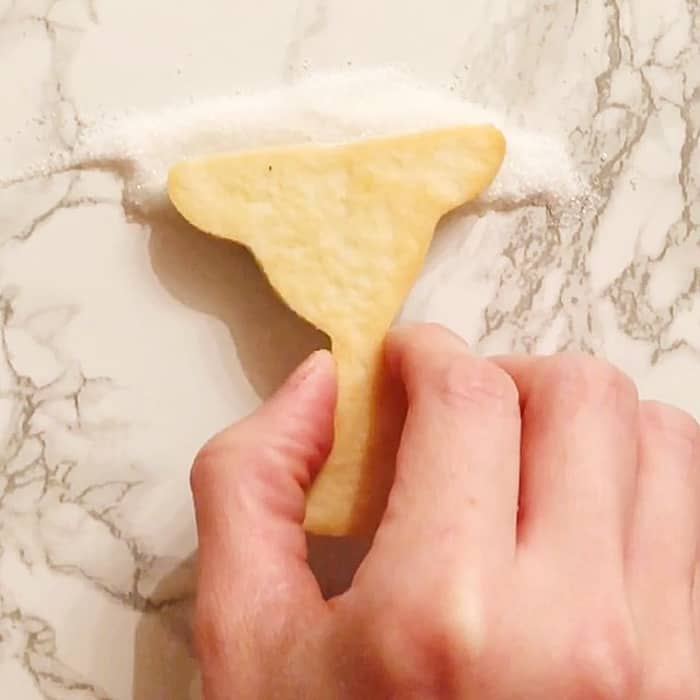
Once the cookie is dry, you can sprinkle a pile of sanding sugar in your work area. Pipe a white line around the rim of the glass, and simply dip the wet icing into the pile of sugar. Use your boo boo stick or scribe tool to set any pieces of sugar that are falling out of place.
Cinco de Mayo Cookies – Limes:
Now you can move onto the super simple limes. These are super easy to make, but since you’ll be using the wet-on-wet technique, you’ll need to move quickly. The key to having a successful wet-on-wet cookie is ensuring that your icing consistencies are on the thinner side, but not so runny that it falls off the cookie.
First, pipe the green for the lime (again, I don’t use tips, but if you were to use one, I always prefer the PME 1.5 or Wilton 2 tips). Before the green icing dries, quickly pipe a thick white outline around the outer edge to replicate the edge of the rind. Finally, pipe a white dot at the top center of the lime.
Again, working quickly and before the icing sets, use a scribe tool, or if you don’t have one, a toothpick, and drag it through the wet icing working from the outer edge inward. This will give your lime the appearance of the individual “sections” of a lime. Once you create each section, just scribble through the white dot at the top to illustrate the center portion of the lime.
Allow both the limes and margaritas to thoroughly dry overnight or in a dehydrator for a few hours. Once dry, grab your cookies, tequila, tacos, and girlfriends, then kick back and enjoy your Cinco de Mayo fiesta!
We’d like to send a big THANK YOU to Samantha of The Smarter Cookie for this cookie decorating tutorial. You’re going to love her cookie designs! Follow her on Instagram for loads of cookie decorating inspiration.


