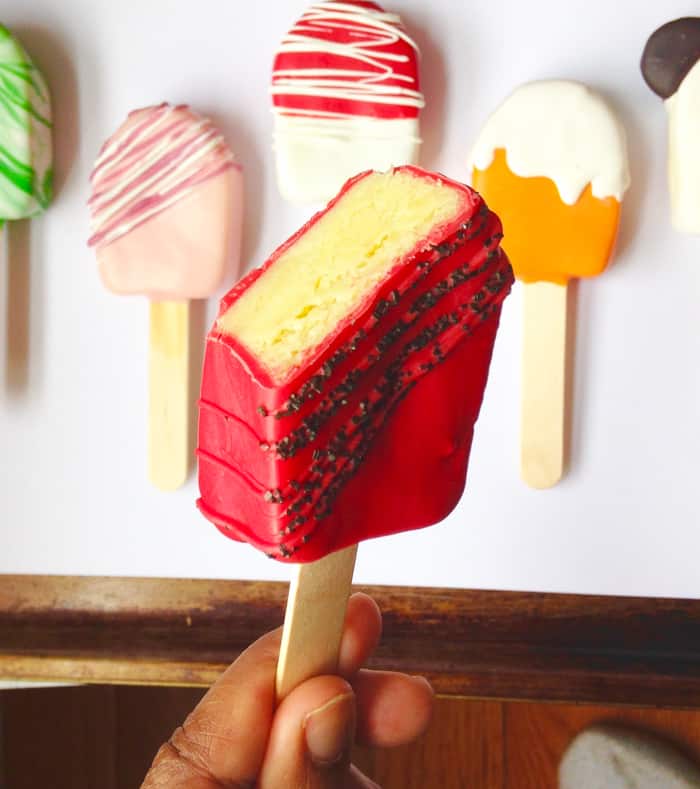
This Cake Popsicles tutorial is courtesy of our contributor Karen of Cake Bites by Karen…This article officially marks my one year of writing for Moms & Munchkins and I couldn’t be happier. Becoming a tutorial writer has stretched my creative bones and pushed me to be a zanier baker. So with that, I present… CAKE POPSICLES!
If you’re on Instagram, you will have seen these cute delicacies everywhere. Cake Popsicles are often made in a silicone mold with the use of cake pop dough and Popsicle sticks. I desperately want one of these molds (hint, hint). But if you’re like me and haven’t been able to get your hands on one (or don’t run a cake pop business and thus don’t want to invest in one), then I’ve found an alternative that has worked for me until someone will hopefully purchase me a Cake Popsicle mold (hint, hint). I will show two ways of creating these beauties – one way with use of a cookie cutter and the other way will be hand-formed.
Cake Popsicles – What You’ll Need:
- Cake Mix
- Egg
- Milk/Water
- Oil
- Can Frosting
- Popsicle Sticks
- Candy Melts (any colour)
- Any decorations
- Mini Ice Cream Scoop (Option #1)
- Rectangular cookie cutter (Option #2)
- Paring knife (Option #2)
- Wax Paper
Step One: Prepare the cake as per the box instructions. Let cool completely.
Step Two: Once cooled, crumble the cake. I remove the bottom and edges of the cake before crumbling, for a smoother cake pop – this is optional.
Step Three: Add about ¼ can of frosting to your cake crumble. I add as little as possible to start – remember you can always add more, but you can’t remove the frosting once you’ve put it in.
Step Four: Knead the frosting and cake crumble together until you get a play dough-like consistency. Form into a large ball.
Step Five (Option #1 – Hand-Formed Popsicle): For consistency in quantity, I often use a mini ice cream scoop to divide my cake pop dough into equal portions. Take a section of the dough, rolling it into a smooth ball. Then with your hands, begin to flatten and mold the cake dough into a Popsicle shape. If you get cracks, you can just use some melted chocolate to cover them up before your final dip.
Set aside on wax paper in the fridge or freezer to firm up. Then take your Popsicle stick and dip the tip into melted chocolate, inserting it into the molded pop. Let this dry/set.
Now for dipping the Cake Popsicle – make sure to use a mug or long/deep vessel to dip your Cake Popsicles into for the final dip.
Take your naked Cake Popsicle and dip into the melted chocolate, making sure the excess runs off before setting it off to dry. If you want to add sprinkles as your decorations, do this before the chocolate solidifies and dries, otherwise decorate however you want.
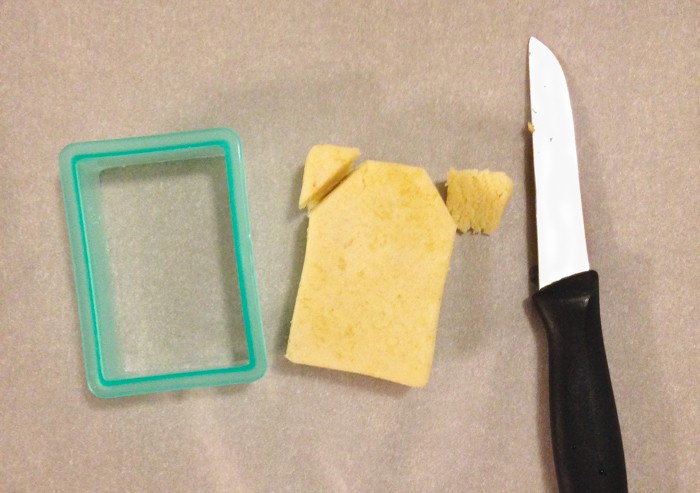
Step Five (Option #2 – Cookie Cutter): Take your cake pop dough and flatten into a pan or container lined with wax paper. Try to flatten the dough evenly so you have a consistent, level and evenly portioned pop. Take your cookie cutter and cut out a rectangle from the cookie dough. With your paring knife, cut the top of the rectangle to emulate the top of a Popsicle.
With your hands, smooth and shape the top portion of Cake Popsicle.
Take the Popsicle stick, dip the tip into your melted chocolate and let set/dry.
Once set, dip the entire Cake Popsicle into the melt chocolate and decorate accordingly.
There is not too much difference between Option #1 or #2, but if you do not have a rectangular cookie cutter, here is an option to just form it by hand.
So until I get my mold, this is the strategy I’ll be using.
When I started writing for Moms and Munchkins, my focus and purpose was to come up with tutorials for the busy and/or working mom with not a lot of time or baking products or experience but a heart to make their kids smile. I strive and will continue to strive to simplify ways of baking in inventive and different ways.
Thank you so much for journeying with me as I continue to learn this baking craft.
Happy Baking Everyone!
Thank you to our contributor Karen for this fun cake pops tutorial! Check out more of her cake pop creations on her Cake Bites by Karen Instagram page. You’ll find even more creative tutorials and treat ideas there! Click here to see all the Cake Pop tutorials she’s created for the Moms & Munchkins audience!


