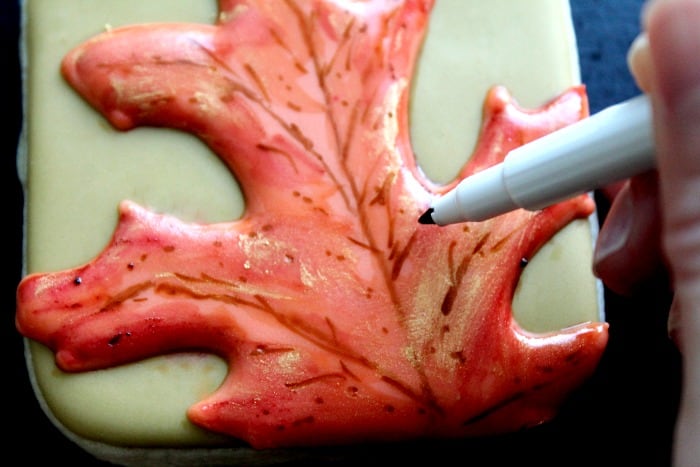
This Autumn Leaves Cookies decorating tutorial is courtesy of our contributor Amy of BZ Bees Sweet Treats…Albert Camus said it best, “Autumn is a second spring when every leaf is a flower”. The rich oranges, reds and golds are truly a sight to behold!
In this tutorial we’ll capture the beauty of fall’s vibrant hues in sweet cookie form. Don’t worry if you don’t have a leaf shaped cookie cutter. These treats can be made on any shape, using actual leaves as templates. Just take a quick stroll around your neighborhood to collect your favorite shapes and let’s get started!
Autumn Leaves Cookies – What You’ll Need:
- Cookies in your desired shape (I used a rounded corner square, but any shape would work here)
- Green 20 second royal icing (I used Americolor moss, but avocado would work as well)
- Copper 20 second royal icing (If you don’t have copper mix a tiny bit of brown or ivory into orange icing)
- Leaves, card stock, scissors and a brown edible ink marker
- Copper and maroon gel food color (orange, red, brown would also be good substitutes)
- Vodka or clear baking extract, and food safe paintbrush
- Optional – gold luster dust
Bake and cool your cookies according to your favorite recipe.
Outline and flood your cookie using the green icing.
Give the cookie a gently shake to help settle the icing. Allow your cookies to dry 12+ hours or overnight for best results.
Trace your leaves onto a sturdy piece of cardstock and cut.
Use your leaf template to trace the design onto your cookie. Feel free to vary the placement and leaf shapes.
Using your copper icing, outline and flood the leaf design. Allow the cookies to dry before moving on.
Once the leaves are totally dry, draw in the veins.
Next, mix a tiny bit of the copper gel color with a few drops of vodka or clear extract. Its important to not use water as it may crumble and pit the copper icing.
Paint the leaf in short strokes using the diluted copper color. You want to see some texture so try not to cover the entire surface in a single direction.
Next, paint the edges and along the veins using the diluted maroon color. Blend the colors as much or as little as you desire.
Once the leaf is dry to the touch, add in some gold accents using the luster dust and a dry brush. This is optional but adds a nice touch.
Next, add in speckled details and some additional vein markings using the brown edible marker.
If using the gold luster dust, you can add a soft border around the entire cookie. Again, totally optional.
These cookies would make a beautiful centerpiece or dessert for Thanksgiving or any autumn dinner party. You can also pipe guests’ names along the leaves to use as edible placecards! Enjoy!
We’d like to extend a big THANK YOU to Amy for sharing these pretty cookies with us. Be sure to follow her on Facebook & Instagram for adorable cookie decorating ideas. You can also order cookies from her! Check out the FAQ section of her website for more information.


