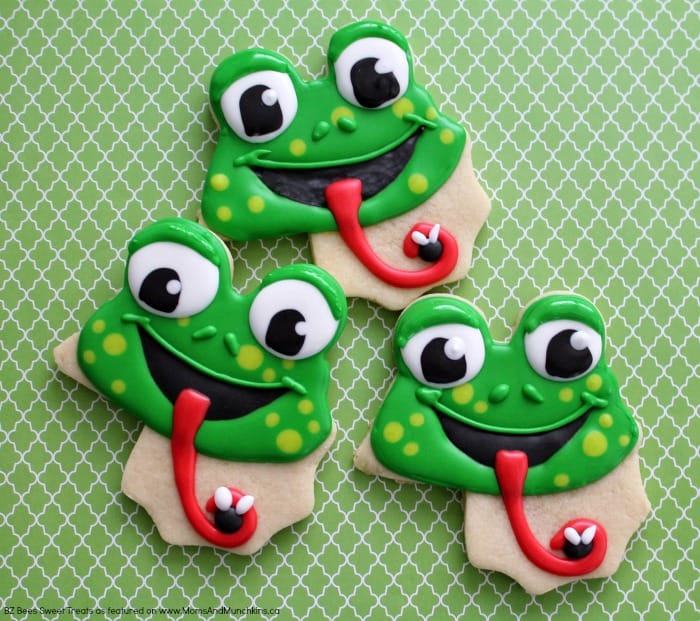
This Frog Cookies decorating tutorial is courtesy of Amy of BZ Bees Sweet Treats…What a treat – we get twenty-nine February days to enjoy this year! Let’s celebrate leap year with a happy little frog tutorial. Hop to it!
Here’s a short & sweet video with a sneak peek on how to make these adorable cookies. Keep reading for the full written instructions with photos!
Callye over at The Sweet Adventures of SugarBelle is the master at turning one cookie cutter into a million other designs. I used her creativity as inspiration for my frogs.
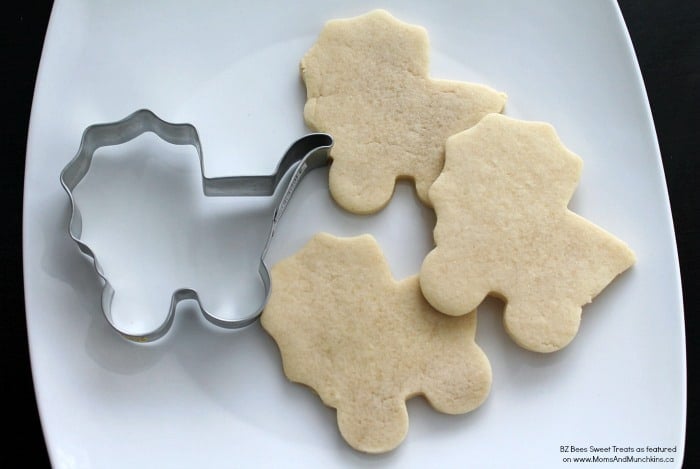
On first look, you’ll notice that I baked up a few stroller shaped cookies (minus the pesky handlebar that inevitably always gets stuck on my cookie dough). When I saw the two wheels I immediately thought they were the perfect size for big eyes! So a quick flip-a-roo and my frog design came to life.
Do you see where I’m going here?
Frog Cookies – What You’ll Need:
In addition to your cookies (here’s a delicious recipe), you’ll also need the following shades of royal icing:
- 2 shades of green 15 second icing (I used a leaf green and a lighter lime green)
- white 20 second icing
- black 15 second icing
- red 20 second icing
- Food-safe marker
Start by outlining the mouth using your food-safe marker. You’ll see I needed a few tries to get the shape right.
Next, outline and fill in with your black icing.
Using the darker green icing, outline the eyes and head of your frog leaving the stroller cover area empty. Immediately fill in being careful not to overlap your black icing.
Using the lighter green, drop in a few spots in random areas around the mouth. You can do this while the darker icing is still wet for a smooth finish, or wait for the dark green to crust over if you want your spots to look more like bumps.
On the empty space of your cookie, make a small black dot for the body of the fly. Let the cookie dry completely before moving on.
Fill in the eyes using your white icing. I like to start in the center and apply pressure to my icing bag until the icing meets the edges. This will give you a more even looking circle than trying to outline first and then fill in.
While the white icing is still wet, outline and fill in the pupils using black.
Add a reflection on each eye by dropping in a single dot of white icing where the black and white areas meet.
Using the darker green, add the nostrils by making a tiny dot and pulling your icing bag towards the mouth. Then, add a line along the top edge of the mouth for added definition.
Next, add the tongue being sure to loop around the fly. Let the eyes and tongue dry before completing the last few steps.
Add the fly’s wings by making a tiny V shape using your white icing.
Go back with your darker green and outline a crescent shape eyelid at the top of each eye. Fill in and let the cookie dry completely before handling.
Hoppy Leap Year!!
We’d like to send a big THANK YOU to Amy for sharing these adorable creations with us. Be sure to follow her on Facebook & Instagram for adorable cookie decorating ideas. I first came across her beautiful cookie creations on Instagram and I was immediately a fan of her work! Have a special celebration coming up? You can also order cookies from her! Check out the FAQ section of her website for more information.


