This Funky Flower Cookies Tutorial is courtesy of our contributor Amy of BZ Bees Sweet Treats…Hip! Hip! Hooray! Three cheers because spring is finally here! I swear winter seems to last longer and longer the older I get. Now that we have officially turned the page on a new season, I’m so ready to see some pops of colors as the flowers and trees begin to bloom. While we’re waiting for the real blooms to blossom, why not enjoy these funky flower cookies? They’d be the perfect edible centerpiece at any spring celebration!
Sometimes I come up with my tutorial ideas weeks in advance, and other times a random idea will come as I’m cleaning up my kitchen from the mayhem of the week’s cookie orders. Such was the case for this particular tutorial.
I had just finished another set of my Monsters Inc inspired baby shower cookies and I was left with the most fun color palette of piping icing – aqua, lime green, purple and black. Add in a little pink from another cookie order I’m just starting and BAM – super fun leftover colors that I just couldn’t bear to waste. And so the funky flower cookies tutorial idea was born – complete with homemade SPRINKLES!
Homemade sprinkles are such a fun and easy project. Perfect for getting the kids involved and the easiest way to custom match your cookies, ice cream and/or cupcake toppings for any celebration. If you’ve ever painstakingly picked out JUST a single color of sprinkles from an assorted mix, this will be right up your alley!
Funky Flower Cookies – What You’ll Need:
- flower shaped sugar cookies baked and cooled according to the recipe
- white 20 second royal icing
- assorted colors of piping icing (black for the petal outlines and any other colors you’d like to incorporate – I used lime, aqua, pink, purple and black)
Since I was using leftover icing from other projects, most of my piping colors were already bagged with either a Wilton tip 1 or PME tip 1.5. You can make the sprinkles using any size piping tip you’d like, or simply snip small holes into tipless piping bags.
Lay a sheet of wax paper on a sheet pan. Use a dab of icing to secure the corners to the pan if the paper begins to curl.
Pipe rows of icing close together, but not touching. Switch colors as you work across the sheet. Let the sprinkles dry 6-8 hours.
Using a sharp knife, cut across your rows of icing. Watch out for jumpers – sometimes the sprinkles like to fly!
Step back and admire your awesome pile of custom color coordinated sprinkles. Hooray!
Since I knew the centers of my flowers would be so colorful, I decided to decorate the rest of the cookie in simple black and white.
Using your white icing, outline a center circle and around each petal.
Immediately fill in the petals, leaving the center of the cookie empty. Let the cookies dry at least 2 hours.
Once the petals are dry to the touch, fill in the center circle.
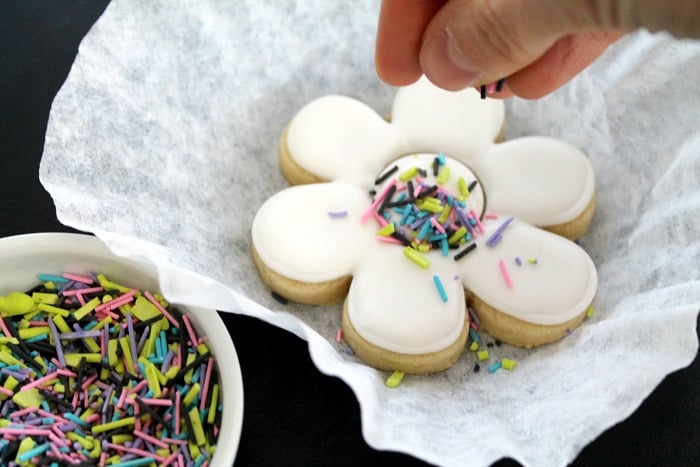
Immediately scatter some of your custom sprinkles over the wet icing. I like to do this over a coffee filter so I can catch the excess sprinkles and easily pour them back into the container.
Once your flower centers are sprinkled, outline each petal using piping icing. You can keep them simple, or further embellish the petals with swirls, dots or stripes.
Allow your funky flowers to dry completely. Enjoy!
We’d like to extend a big THANK YOU to Amy for sharing these fun cookies with us. Be sure to follow her on Facebook & Instagram for adorable cookie decorating ideas. You can also order cookies from her! Check out the FAQ section of her website for more information.


