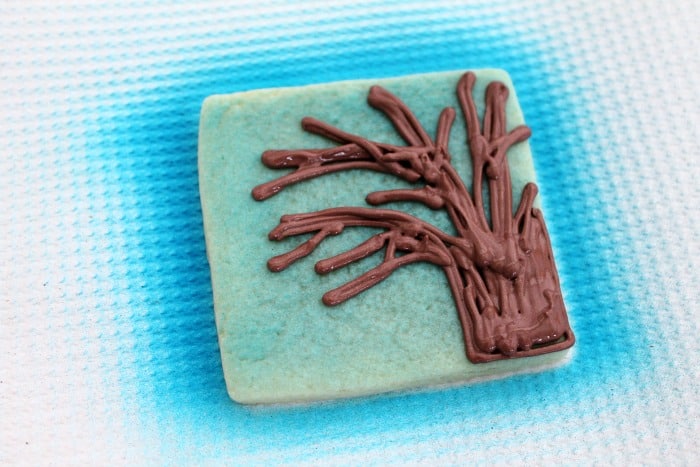
This Autumn Tree Cookies tutorial is courtesy of our contributor Amy of BZ Bees Sweet Treats…As I drive through my town each day, I’m struck by the beauty of nature – particularly the vibrant colors on the neighborhood trees. There is just something about those pops of crimson and gold that gets me out of my cold weather blues. These cookies capture the color and textures of Autumn in a few simple steps.
Autumn Tree Cookies – What You’ll Need:
- Cookies in your desired shape – I used squares, but you can use any shape you’d like: circles, rectangles or even a fancy plaque would beautiful touch!
- Brown piping consistency icing (Wilton tip 2)
- Red, yellow and/or orange 20 second icing
- Square tip food-safe paintbrush (Wilton has a 5 pack available here)
I wanted to have a variety of textures on these cookies so I decided to color the actual cookie blue instead of starting with a layer of icing. You can achieve this in a few different ways:
Airbrush or use Wilton color mist, paint using a tiny bit of gel color mixed with vodka (water will make your cookie mushy), or color using an edible ink marker.
Any of the above options would work. I decided to airbrush using Americolor sky blue.
Once the cookie base is colored, pipe on a trunk and a few branches using brown icing. Don’t worry about blending the lines of icing together. They’ll resemble a tree trunk if you just pipe the strands close together, and leave strands just as they fall. Allow the icing to dry completely – a few hours or overnight if time allows.
Next, we’ll add the leaves. I recommend using two colors per cookie for dimension. Start with your darkest color – I used red.
Pipe on 2-3 blobs of icing in your chosen color. Immediately take your paintbrush and “stipple” the blobs. Hold your paintbrush straight up and down and stamp each area of icing, leaving some naked cookie visible.
Allow the first color to dry and then add another 2-3 dots of your lighter icing – I used yellow. Follow the same method, but let more of the darker color show through.
Allow your cookies to dry, admire, then enjoy!
We’d like to extend a big THANK YOU to Amy for sharing these beautiful cookies with us. Be sure to follow her on Facebook & Instagram for adorable cookie decorating ideas. You can also order cookies from her! Check out the FAQ section of her website for more information.


